The Easiest Way to Understand How Appium Works

Table of Contents
APPIUM
In case you don’t know :
Appiumis an open-source project and ecosystem of related software, designed to facilitate UI automation of many app platforms, including mobile (iOS, Android, Tizen), browser (Chrome, Firefox, Safari), desktop (macOS, Windows), TV (Roku, tvOS, Android TV, Samsung), and more! ref - appium.io
Although it’s not required to for this article, here’s how to Install Appium
Simplest way to explain how Does Appium Work?
Before you reach a point of demonstration for a straightforward login scenario in a mobile test automation demo, it’s essential to recognize the intricate blend of science, mathematics, and engineering that forms the backbone of this process.
In this blog, I’ll break down the intricacies and shed light on the most crucial elements, explaining it in the simplest way possible.
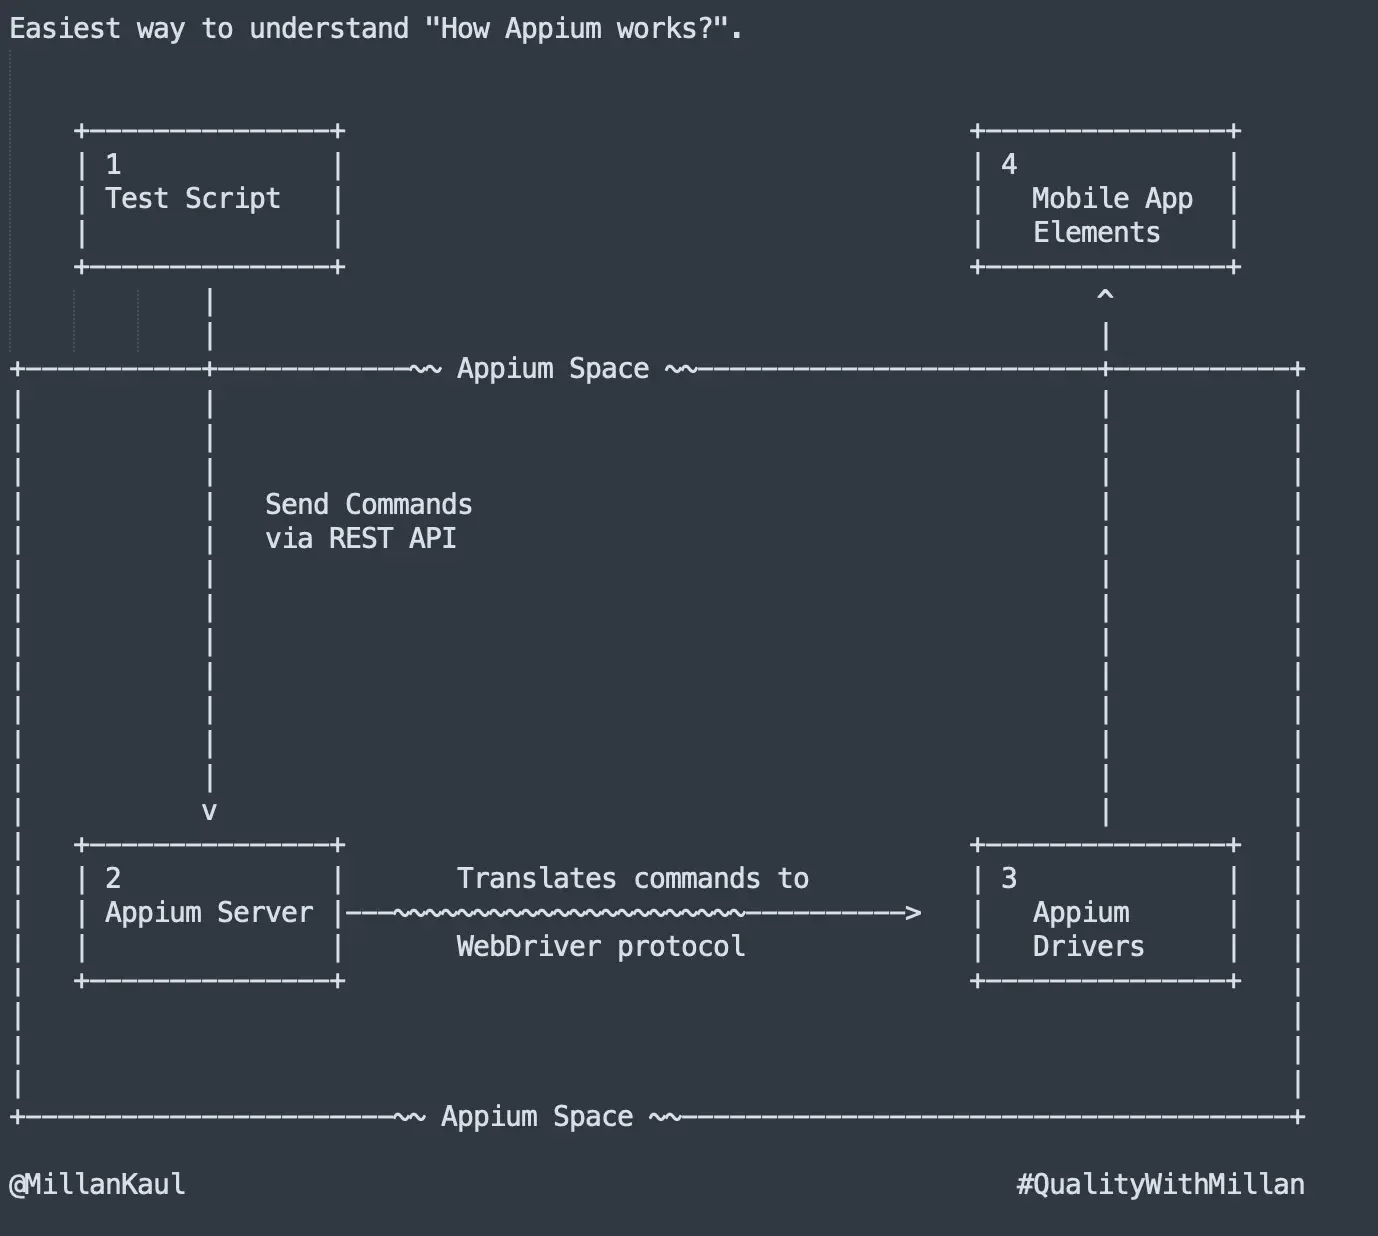
You can get a deeper understanding of “How Appium works” from Appium in a Nutshell, but for now let me present some easy and simple steps to provide you with a clearer understanding of the role of Appium in test automation.

▸ Test Script:
This is where your testing journey begins. You have a script that defines the actions you want to perform on a mobile application. To simplify this is your test automation framework. That has to ultimately interact with Mobile App Elements (Step #4).
Step 1: Test Script to Appium Server
Using your Test Script, you create a test that outlines the actions you want to perform on the mobile app.
And Appium Server serves as the bridge between your test script and the mobile app elements. Simple and easy: It’s responsible for receiving commands from the test script.
Step 2: Appium Server Translates Commands
Upon receiving commands, the Appium server translates them into a format understandable by the WebDriver protocol.
Step 3: Appium Drivers Execute Commands
Appium drivers are specific to each platform (Android or iOS) and are responsible for executing the translated commands on the mobile app elements. They are one of the core roles of what Appium Development community does.
Step 4: Interaction with Mobile App Elements
The Appium drivers interact with the mobile app elements based on the translated commands (coming from Test Scripts), such as clicking buttons or entering text.
Appium acts as a mediator, translating your high-level commands (from test scripts) into actions that the mobile app can understand and execute. This simple yet powerful process allows you to emulate and automate testing scenarios efficiently.
But wait, how does that translate to the automation code? I need code to see all the above steps in reality.
Not to worry, I have you covered.
Let me use the simplest way to explain how a login scenario works for a social media app (with respect to the above steps).
Reference code : All of the above steps can be roughly mapped to below code, using JavaScript syntax.
// Step 1: Test Script - Setting Desired Capabilities
const desiredCapabilities = {
    platformName: 'Android',  // or 'iOS'
    platformVersion: '11.0',  // replace with your device version
    deviceName: 'emulator-5554',  // replace with your device name
    appPackage: 'com.example.socialmediaapp',
    appActivity: 'com.example.socialmediaapp.LoginActivity',
};

// Step 2: Creating Appium Driver Instance
const driver = await new webdriver.Builder()
    .usingServer('http://localhost:4723/wd/hub')
    .withCapabilities(desiredCapabilities)
    .build();


// Step 3: Connect to App
// (Implicitly assumes that the app is already open)


// Step 4: Execute Commands
const usernameField = await driver.findElement(By.id('username_input'));
const passwordField = await driver.findElement(By.id('password_input'));
const loginButton = await driver.findElement(By.id('login_button'));


// Step 5: Translate to UIAutomator or XCUITest (Happens behind the scenes)

// Step 6: Automation Actions
await usernameField.sendKeys('your_username');
await passwordField.sendKeys('your_password');
await loginButton.click();
Follow my hashtag #QualityWithMillan on LinkedIn or just follow me