Get startd with API testing using nightwatch V3 🦉
Table of Contents
Introduction
The official Nightwatch website states that “it’s one framework for all platforms”
- Mobile web
- Native mobile
- Real desktop browsers
- Accessibility
- Visual testing
But what caught my attention was its lightweight, quick and easy setup. For API testing in as little as 15 minutes (including setup!)
Without a wait, let me show you how easy it is set up and run your first API test withing minutes in just 2 steps.
set up & run ++ HTML report no complex configuration required..
Prerequisites
Latest LTS version of NodeJS, you may download it from here
1. Set up ⚙️
Open your terminal and start following the steps AS-IS please.
1. Create a directory named nightwatch-api-automation or anything you like, this is where you will setup your project + nightwatch
mkdir nightwatch-api-automation
2. Install using below command or follow steps to install nightwatchJS
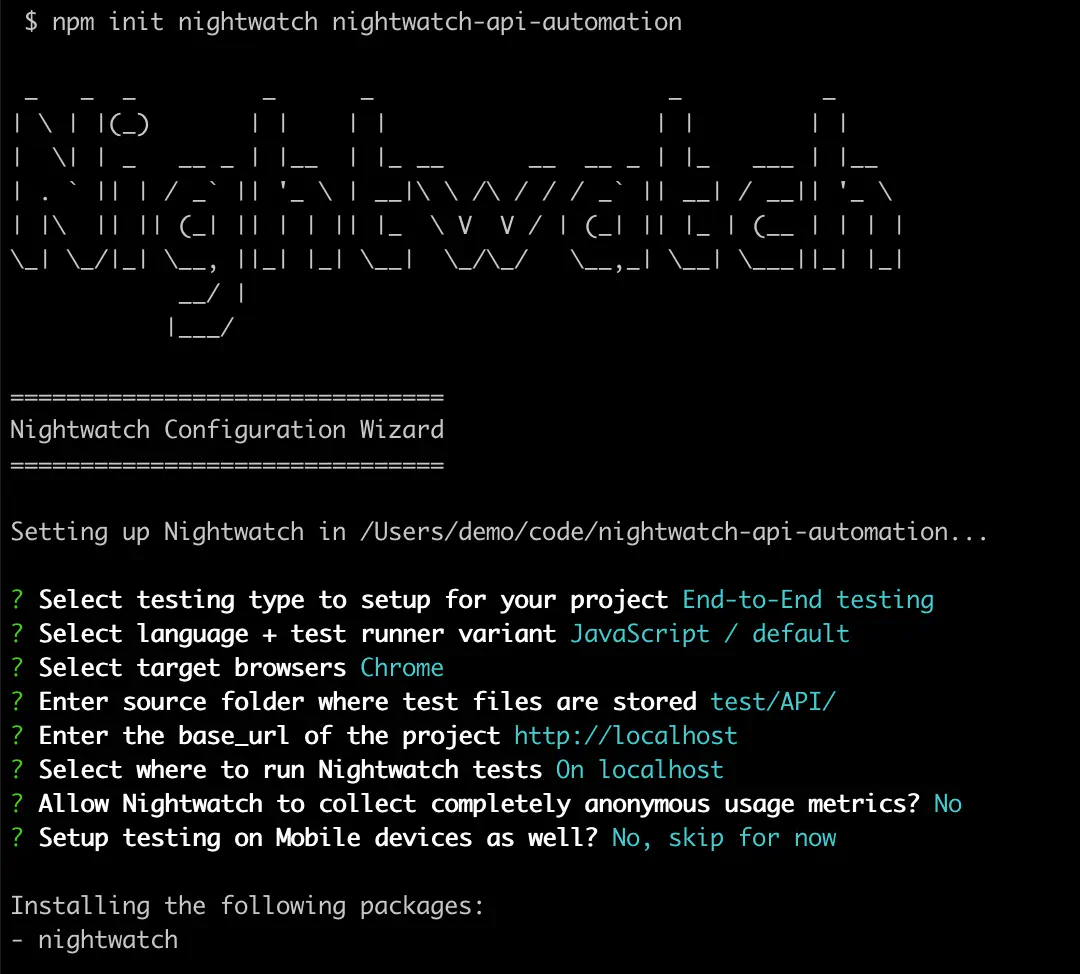
npm init nightwatch nightwatch-api-automation
Choose the config options as per below screen shot [ I kept my choice simple ]
Now let’s go inside the nightwatch-api-automation directory.
cd nightwatch-api-automation
And add nightwatch apitesting dependency to this project.
npm i @nightwatch/apitesting --save-dev
3. Update config for api test
Let the project config know that you want to run API test’s only, so :
Go to nightwatch.conf.js file and add apitesting as a plugin.
Replace `plugins: [],`
with    `plugins: ['@nightwatch/apitesting'],`
In same config file (nightwatch.conf.js) add details about api_testing{} object like this ( 📝 copy paste is fun)
So this ⬇️
    webdriver: {
        start_process: true,
        server_path: ''
      },

    },

    chrome: {
      desiredCapabilities: {
Becomes ⬇️
    webdriver: {
        start_process: true,
        server_path: ''
      },

    },

 api_testing: {                 // start
   start_session: false,
     webdriver: {
       start_process: false,
   }
 },                             // end

    chrome: {
      desiredCapabilities: {
That’s it, end of set up step ! 🙌🏼
2. Run 🏃🏻♂️
Let’s create a simple API test and run that.
- Create a folder named
APIundertestfolder. - Then create your test file named
api-test.jsunderAPIfolder or simply run:
touch ./test/API/api-test.js
Copy this code in the newly crerated file api-test.js ( 📝 copy paste is fun again !). Reference from nightwatch
describe('api testing', function () {
  it('get api test', async function({supertest}) {
    await supertest
      .request("https://petstore.swagger.io/v2")
      .get("/pet/findByStatus?status=available")
      .expect(200)
      .expect('Content-Type', /json/)
      .then(function(response){
          expect(response._body.length).to.be.greaterThan(0);
      });
  });
});
Although it’s pretty self explanatory if you have used javascript/Typescript. TL;DR
We hit the endpoint
https://petstore.swagger.io/v2/pet/findByStatus?status=availableand then assert reponse code (200) and (json) response value.
Time to run the API test 🧑🏻💻
On your terminal run this command to start your API test by :
npx nightwatch test/API/api-test.js --env api_testing
You should see run result like this.
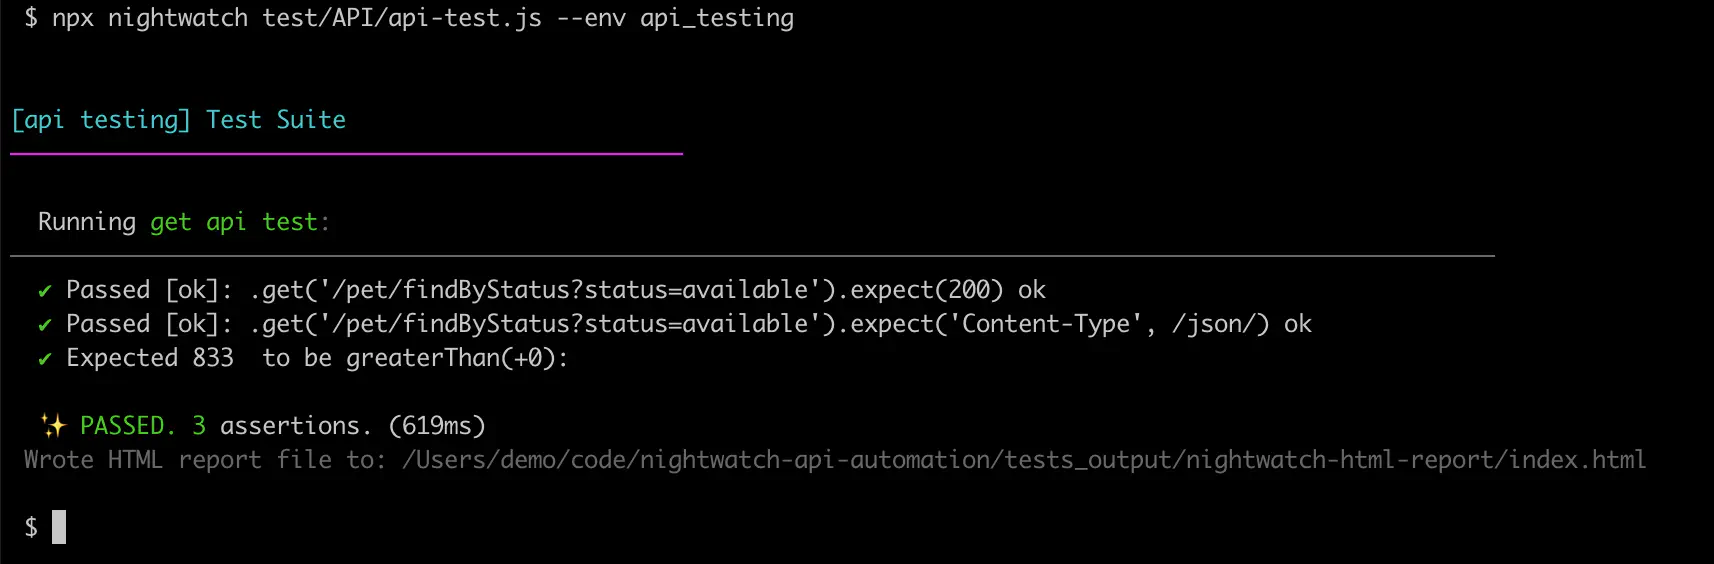
Note: Here api_testing is to run API test as per our config we did above during set up. This way nightwatch does not mix API test’s with UI tests run.
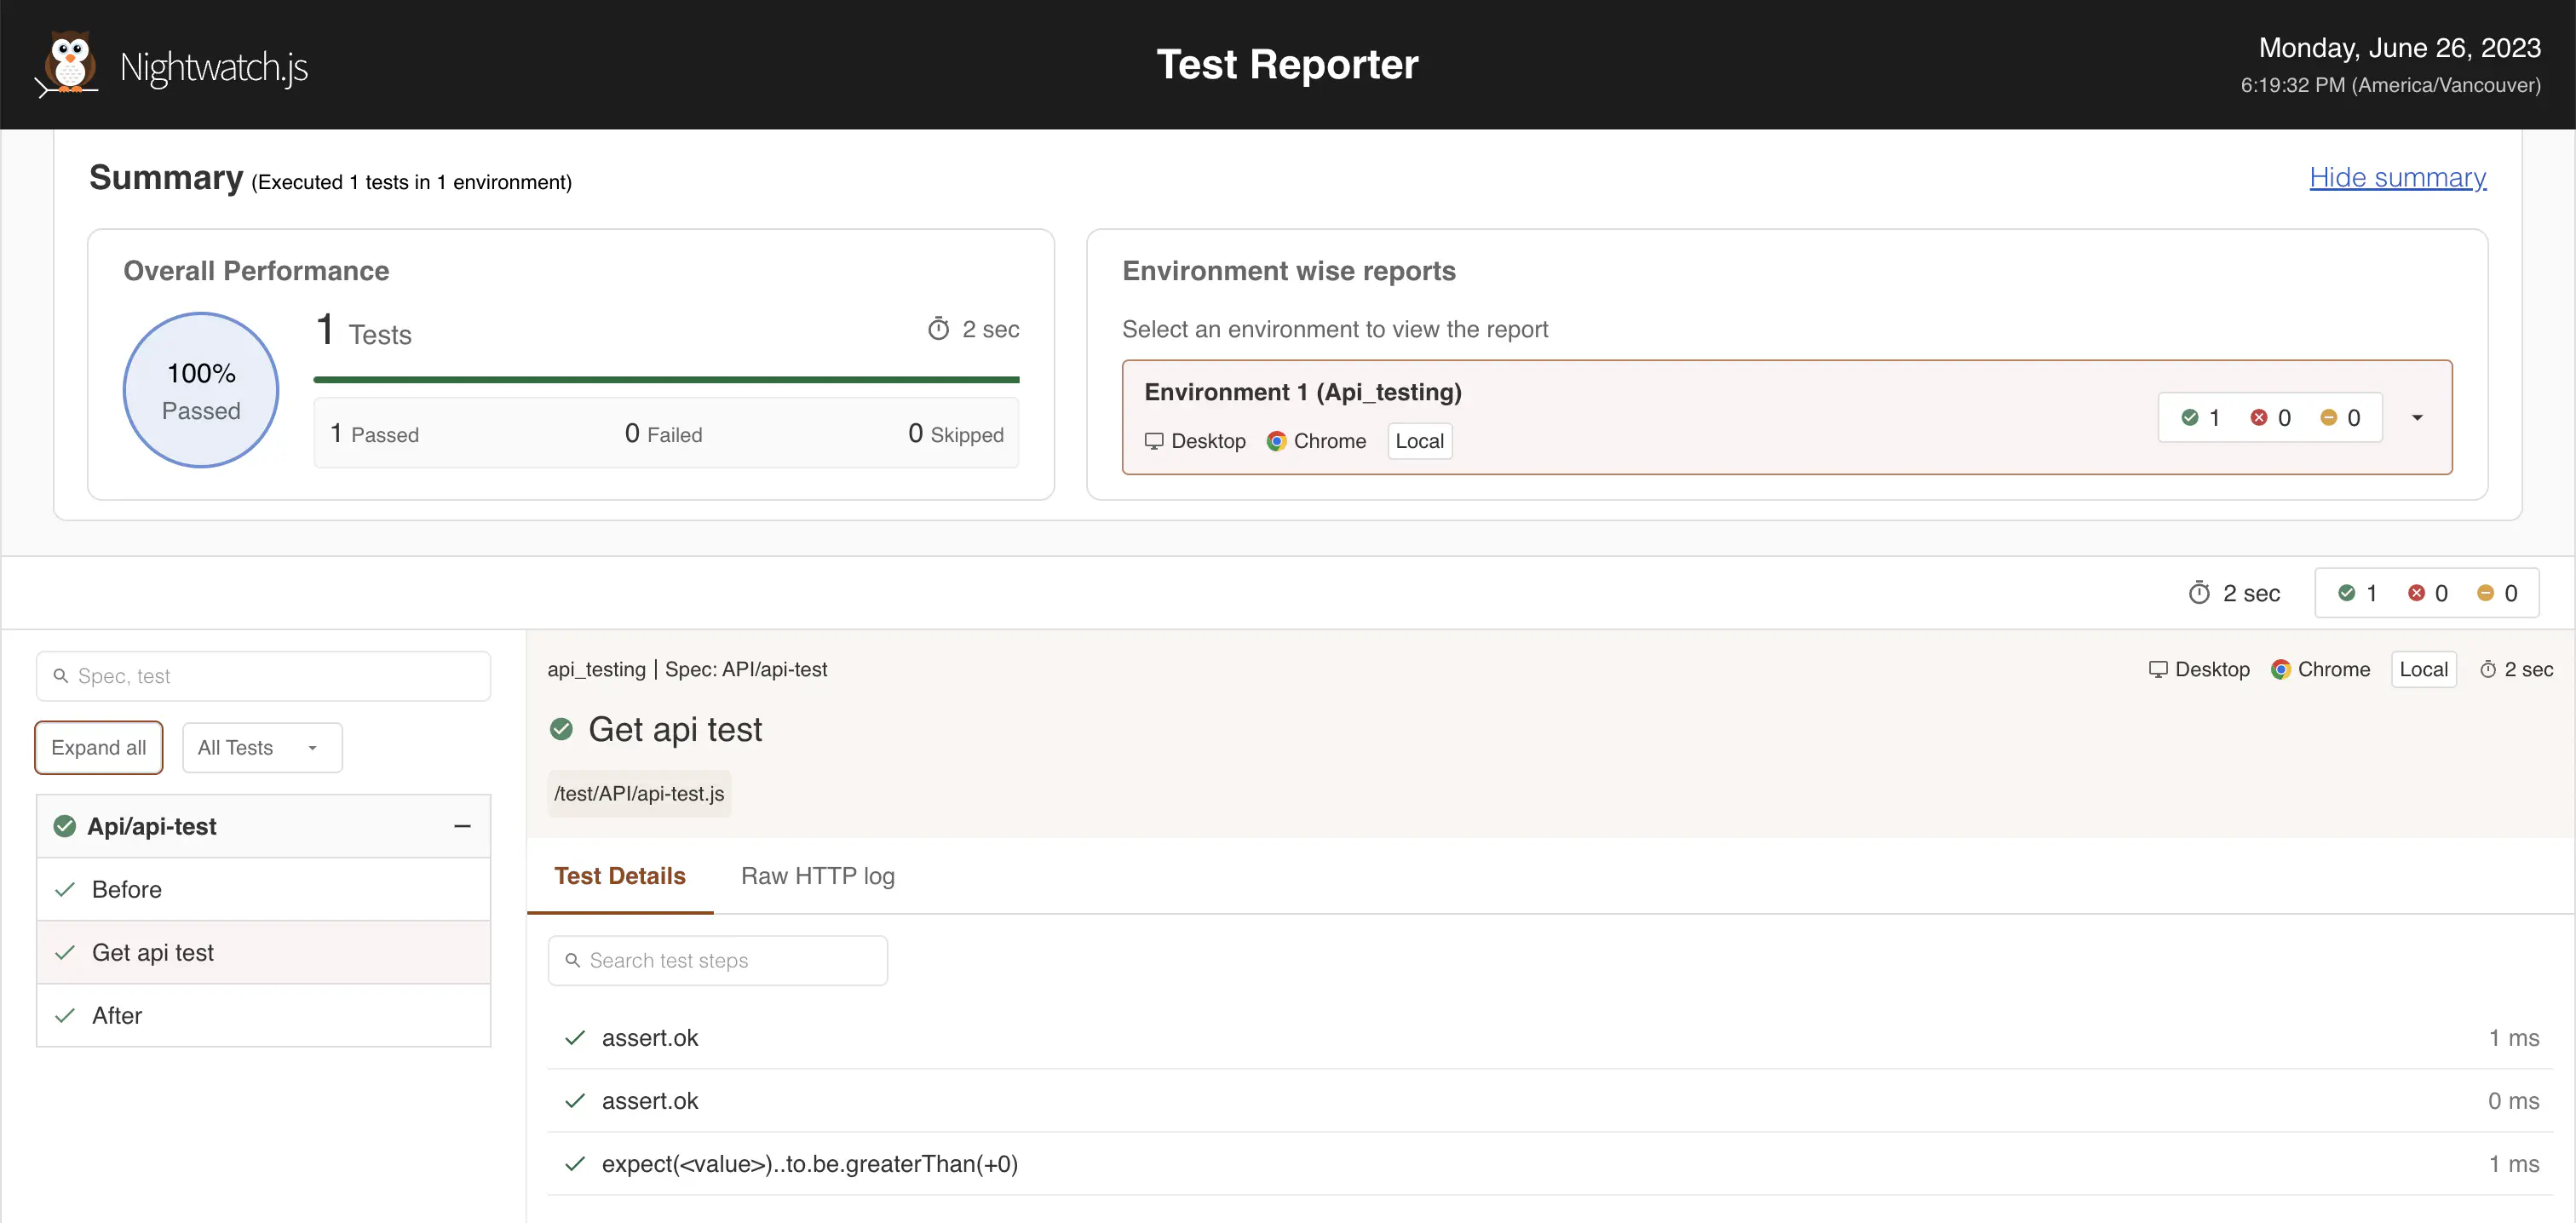
Bonus automated HTML report 📊
Not to worry, automated reports are already generated and waiting for you to open.
Go ahead and look for index.html file here nightwatch-api-automation/tests_output/nightwatch-html-report/index.html.
Right click & open index.html using any browser, for example see my html run result, report on chrome.
And that’s it! 🙌🏼
Have fun with 🚀 API testing and HTML reports 🟢 🌕 🔴